For account setup and first login, see the Quick Start.
Platform workflow
Kontratar supports government contracting work across four stages:Home Dashboard
The Home Dashboard displays after login. It contains:- Opportunity summary charts filtered by your configured NAICS codes. These show the volume and distribution of active opportunities across agencies.
- Award and forecast data for your tracked industry sectors.
- Performance metrics for your tracked opportunities and proposals.
Opportunities
The Opportunities section contains two tabs:SAM tab
Displays federal contract opportunities sourced from SAM.gov (System for Award Management). SAM is the official U.S. government system for publishing contract solicitations, including RFIs, RFQs, RFPs, Sources Sought notices, and award notifications..png?fit=max&auto=format&n=n4UKL_7oO-2yPGeD&q=85&s=909e7ce4fada05de9b5f2147f836a704)
- Filter by NAICS code, agency, or date range
- Click any opportunity to view its full solicitation details
- Click Track to add the opportunity to My Desk
- Click Discard to remove it from your active view
- Generate a proposal or response directly from the opportunity detail screen
.png?fit=max&auto=format&n=n4UKL_7oO-2yPGeD&q=85&s=84d45514d932be115dbf8b5e4709a07a)
Custom tab
Displays opportunities created manually by your organization. Use custom opportunities for state or local government bids, commercial RFPs, or solicitations not published on SAM.gov..png?fit=max&auto=format&n=n4UKL_7oO-2yPGeD&q=85&s=c4618d9a1a2d27981f595548eca22e1e)
- View or create custom opportunity listings
- Click Proceed to Track to save a listing to My Desk
- Filter by date
- Generate a proposal from any custom listing
My Desk
My Desk is your personal workspace for managing opportunities you have acted on. It contains three tabs: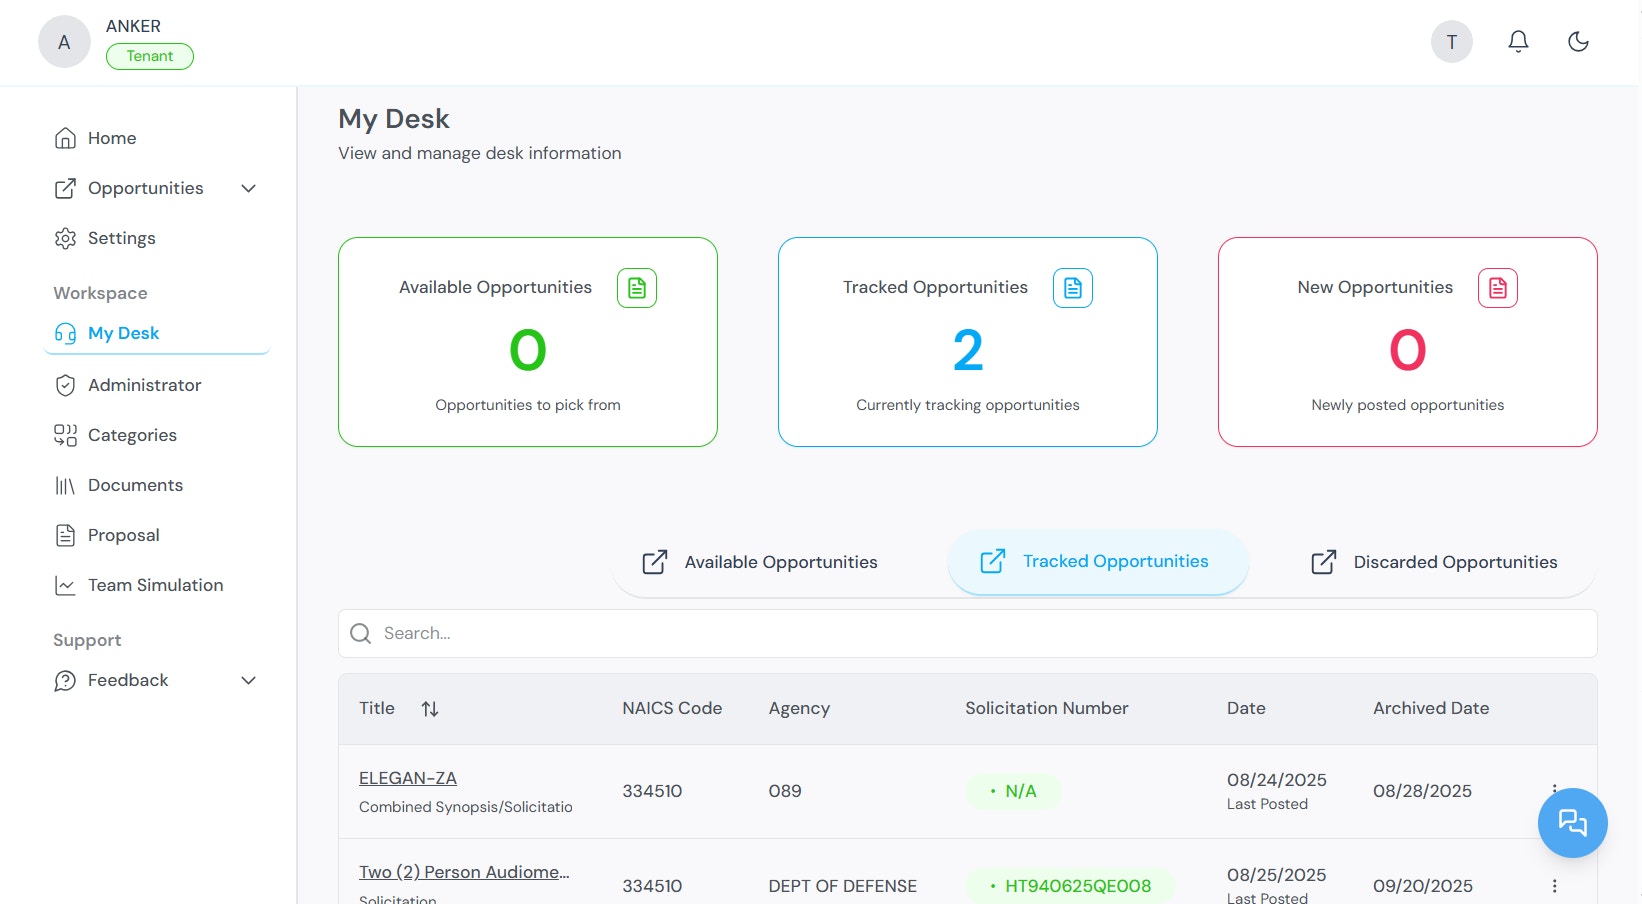
From My Desk, you can generate proposals and create proposal drafts for any tracked opportunity.
The Partners section within My Desk shows opportunities that may require teaming arrangements. You can view ranking data for potential collaborators and manage partnership-based submissions.
For full instructions, see Tracking Government Opportunities.
Proposal Generation
The Proposal Generation module creates structured proposal documents from tracked opportunities. It uses AI to analyze solicitation requirements and combine them with your company profile and uploaded documents.Generation types
Generation process
- Select a tracked opportunity from My Desk.
- Click Create Sources Sought Response.
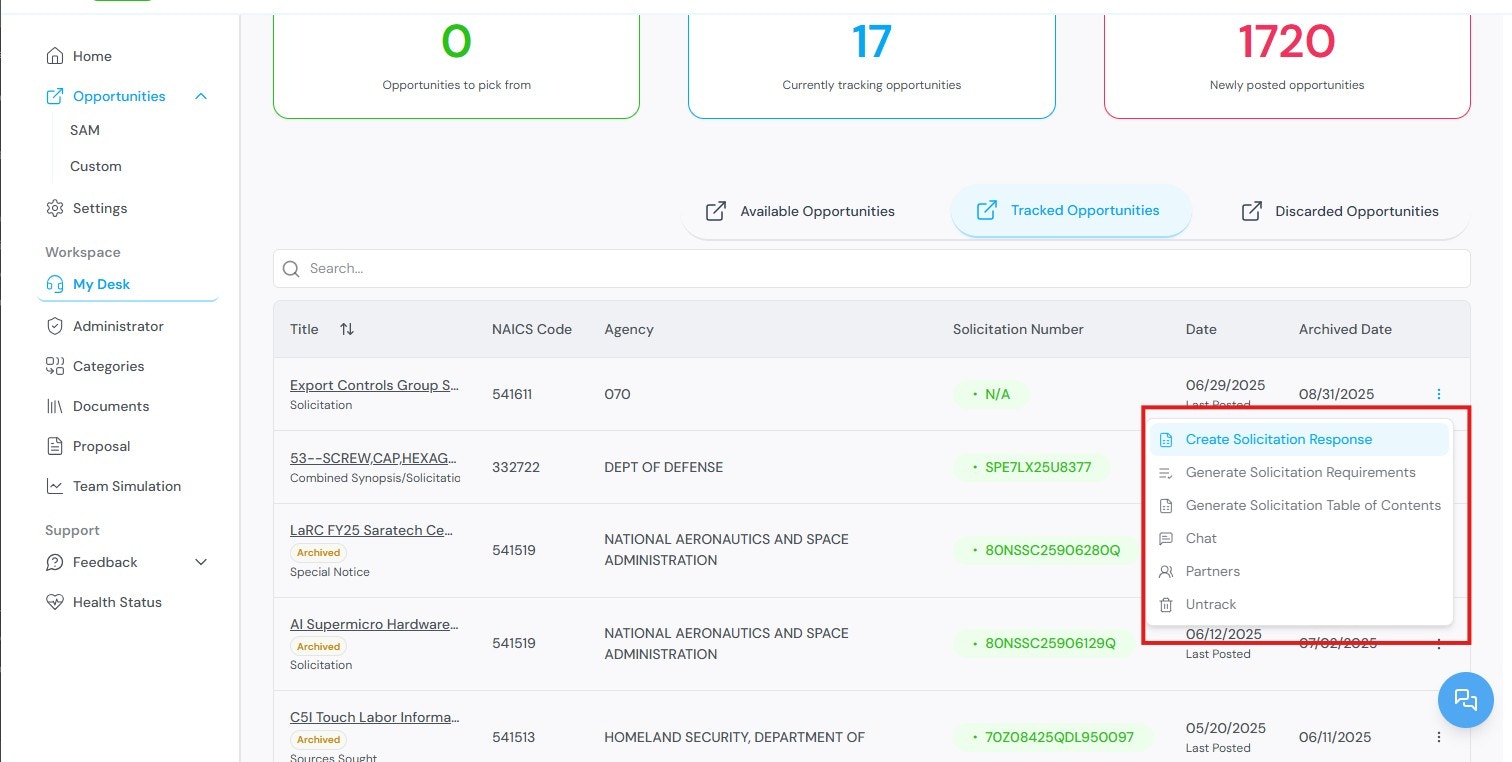
- Select a company profile.
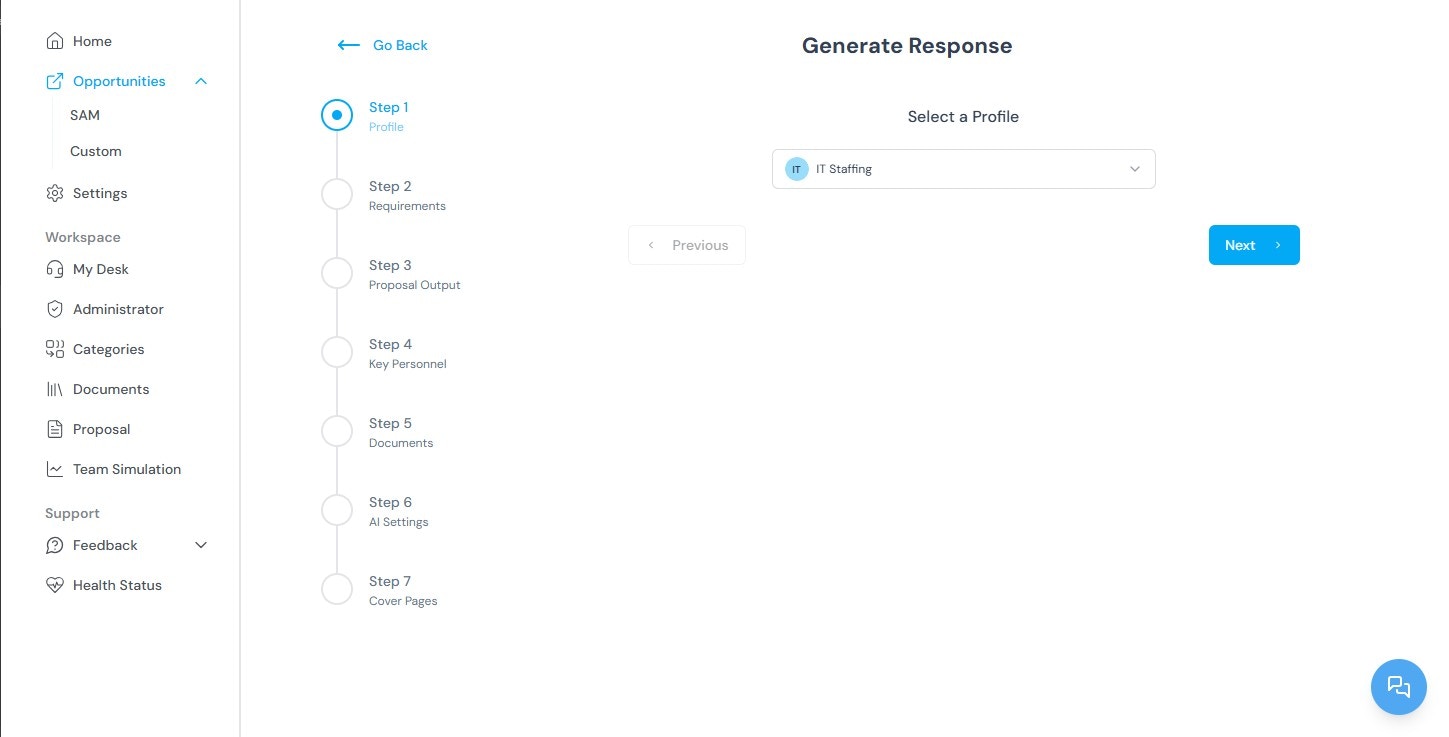
- Review the extracted requirements.
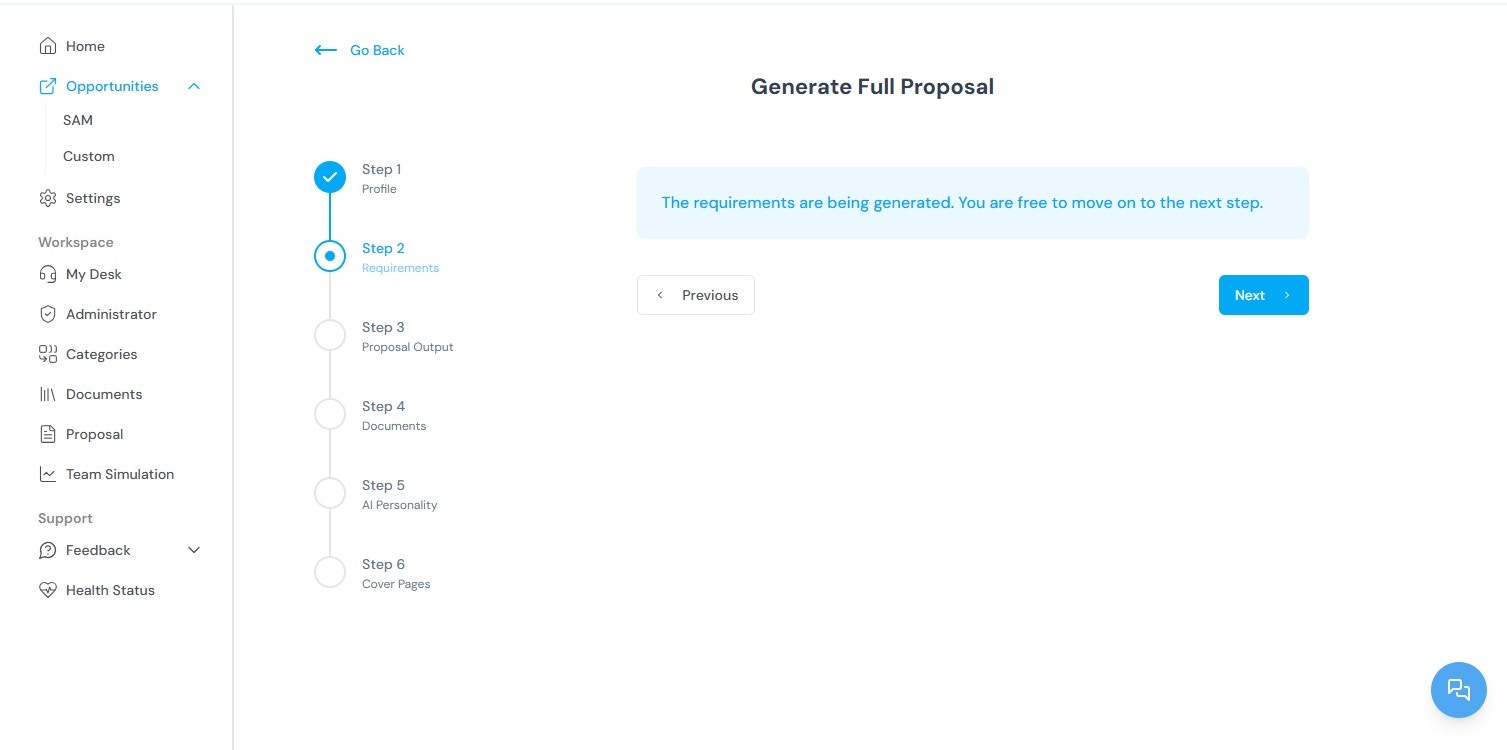
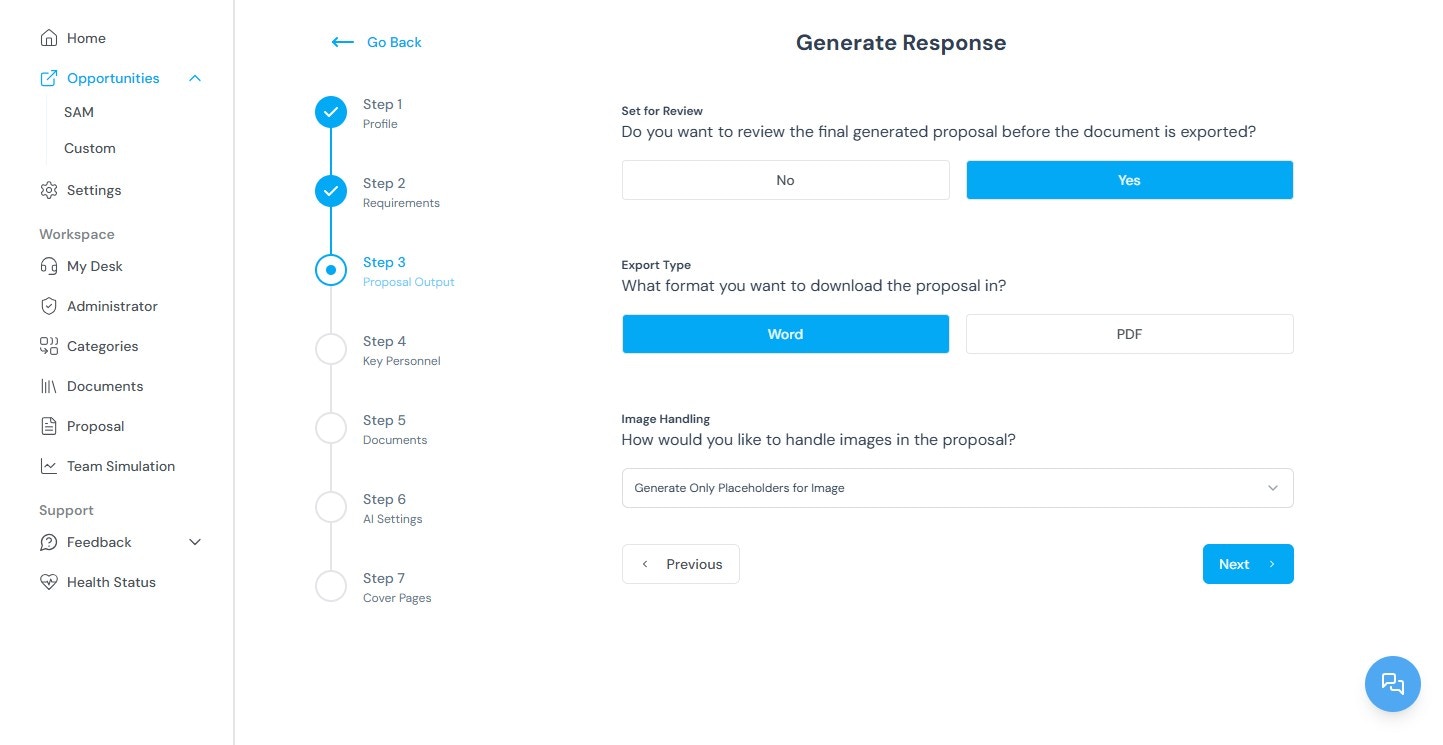
- Configure the proposal output: export format (Word or PDF), image handling, volume types, AI personality, additional documents, and cover page design.
- Click Generate Proposal.
Editing proposals
Proposals are edited through a passphrase-protected environment. Each proposal is organized into volumes or sections (for example, Executive Summary, Technical Approach, Past Performance). Editors can be assigned to specific sections, and the platform tracks all changes with version control. The Actions tab provides project management controls: due dates, contributor deadlines, and reminders. For full instructions, see Proposal Generation.Team Simulation
Team Simulation evaluates how well your organization or a teaming partner meets a specific opportunity’s requirements. The system analyzes your uploaded documents, company profile, and partner data against the opportunity’s solicitation.Running a simulation
- Go to the Simulation section in the Workspace panel.
.png?fit=max&auto=format&n=n4UKL_7oO-2yPGeD&q=85&s=76478bc6f1e1ca5eece9435dca40fdf3)
- Click Generate Simulation.
.png?fit=max&auto=format&n=n4UKL_7oO-2yPGeD&q=85&s=cf32b6c50c2c19aeecc69a2c051f4d93)
- Enter a simulation title.
.png?fit=max&auto=format&n=n4UKL_7oO-2yPGeD&q=85&s=101831fbcb948a08356e5212b1d2a9d3)
- Select the opportunity source: SAM or Custom.
.png?fit=max&auto=format&n=n4UKL_7oO-2yPGeD&q=85&s=379c249494cedcb83bd2b30230fe5dbc)
- Select the specific opportunity.
- Select the client (your company or a partner).
.png?fit=max&auto=format&n=n4UKL_7oO-2yPGeD&q=85&s=1355b5239453753163e0a7031f65f0a5)
- Click Generate.
.jpg?fit=max&auto=format&n=3WoSENtu9fHKdt2k&q=85&s=45095da2c4691076e0d6ab4b26903f57)
Documents
The Documents section stores files uploaded by your organization. These files are used by the AI during proposal generation and team simulation. The more relevant the uploaded documents, the more accurate the generated output.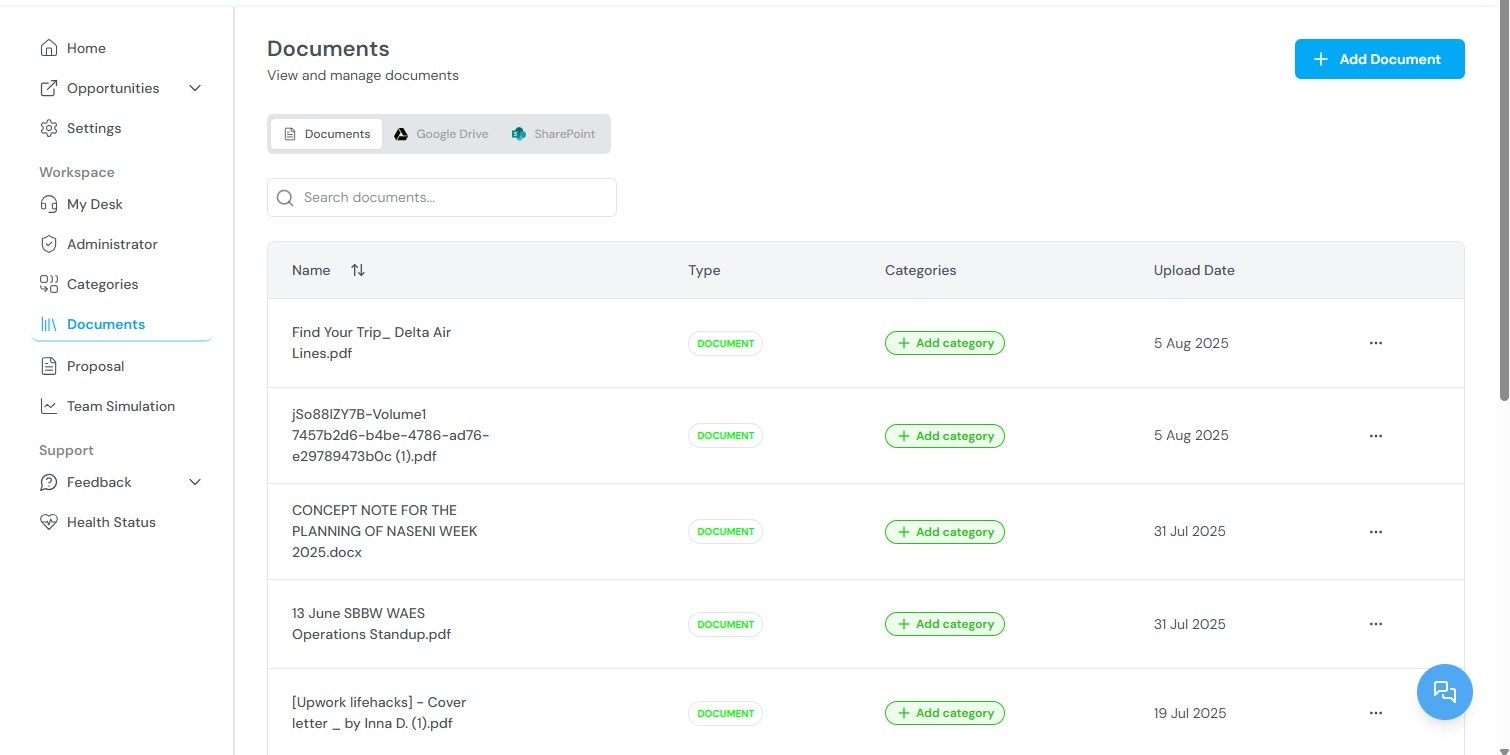
- View all previously uploaded documents
- Upload new documents (past performance narratives, capability statements, resumes, certifications)
- Tag documents with categories for organization and filtering
- Reuse documents across multiple opportunities
Categories
Categories are classification tags applied to documents and partner profiles. They support organization, search, and filtering across the platform.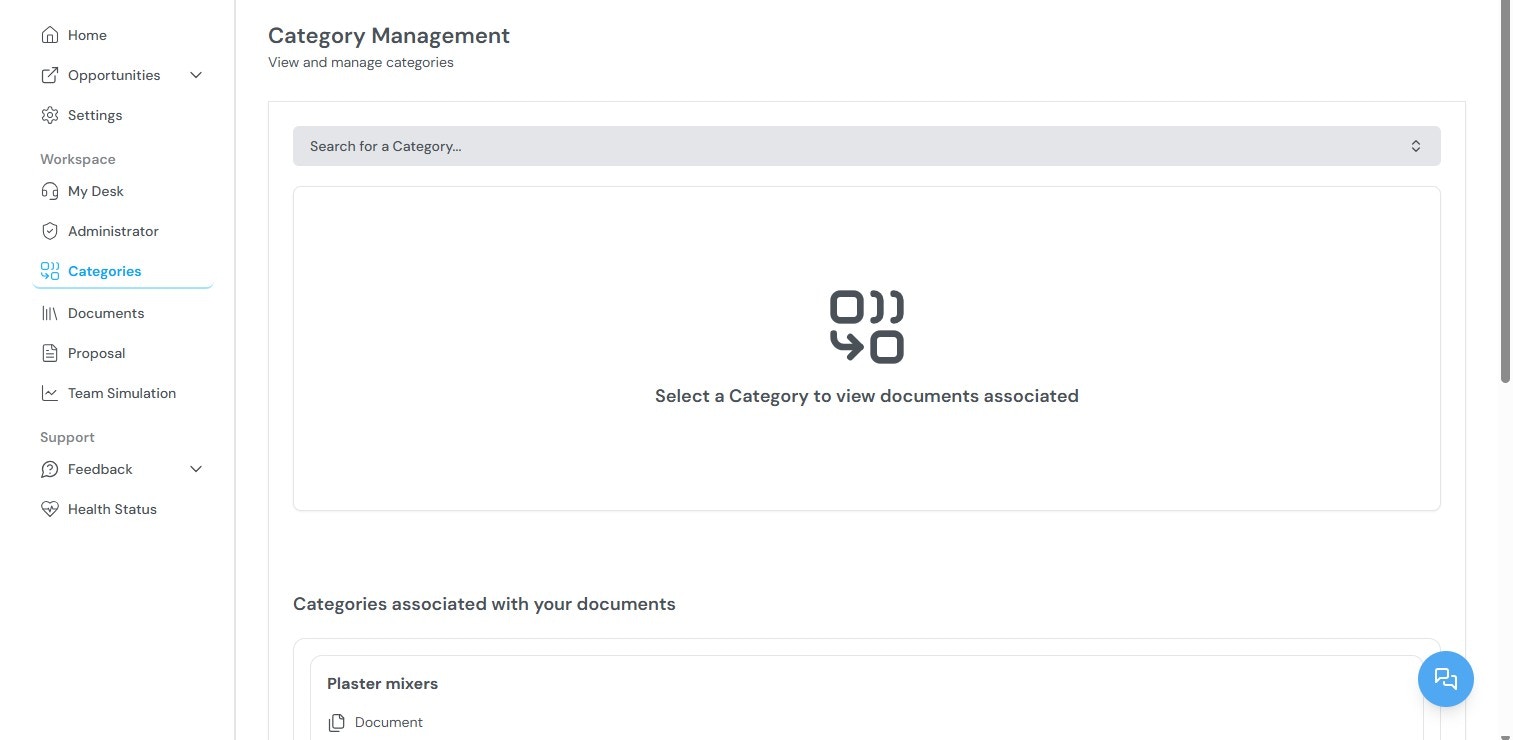
- View all existing categories
- Search categories by keyword
- Add or remove documents from categories
Administrator
The Administrator panel is visible only to Super Admins and Tenant Admins. It contains the following sections:.jpg?fit=max&auto=format&n=mwoIaF9ADLshGR-L&q=85&s=92e0a9b3da607bdb19f8c0b757cbf633)
Only one Tenant Admin is allowed per organization.
Settings
The Settings page controls workspace-level configuration:- NAICS codes — Add or remove codes to change which opportunities are displayed.
- Notifications — Configure how and when alerts are delivered for new opportunities, amendments, and deadlines.
- Display preferences — Adjust workspace layout and view options.
Support
Click the Support icon in the bottom-right corner of any screen to access help resources, product documentation, and customer support contact options. For issue reporting and feature requests, see Maintenance and Support.Related topics
- Quick Start — Account creation and initial configuration.
- Tracking Government Opportunities — Browsing, filtering, and tracking opportunities.
- Proposal Generation — Creating proposals from tracked opportunities.
- Team Simulation — Evaluating organizational fit for specific opportunities.
- Administrator Workspace — Managing users, partners, teams, and settings.
- FAQ — Common questions about Kontratar.